The Mpx5700dp sensor, highly regarded for its precision and robustness, has become popular in various Arduino projects. This article explores its integration, shedding light on the workings of this versatile sensor. By understanding its functionality, enthusiasts can effectively utilize it in diverse applications ranging from weather stations to industrial automation.
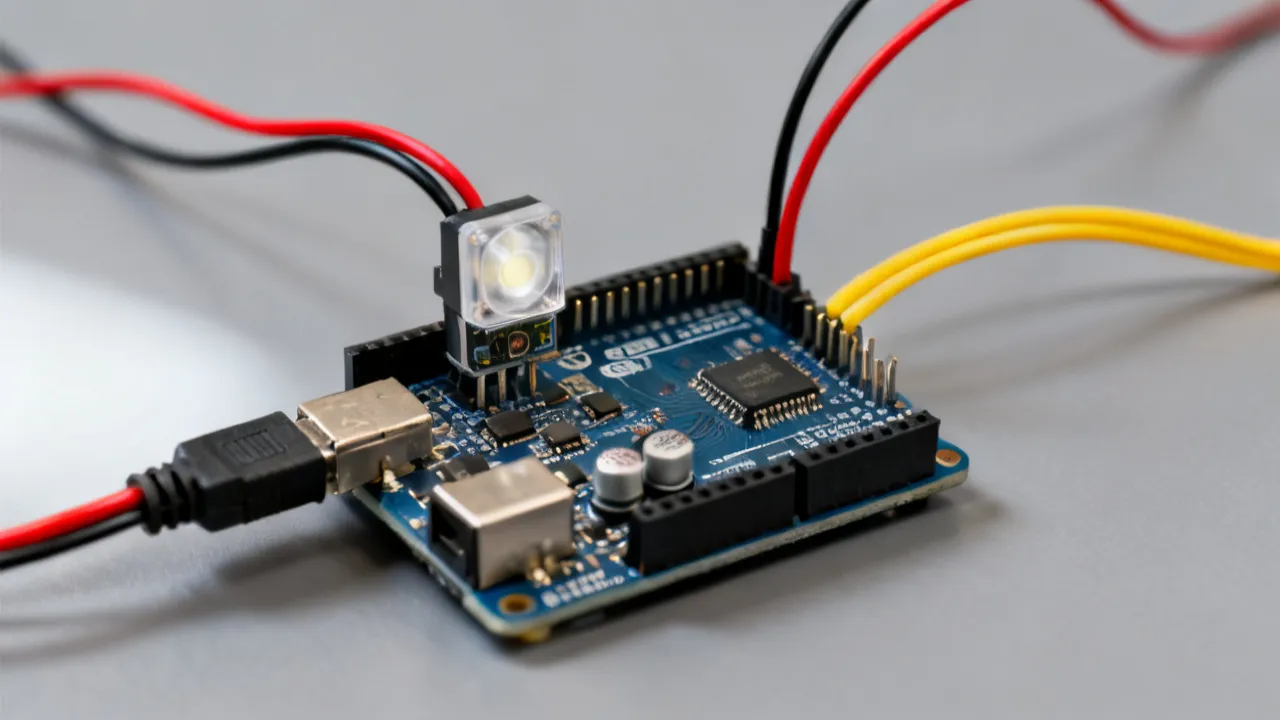
The Mpx5700dp sensor is a differential pressure sensor known for its accuracy and versatility. Designed to measure pressure differences, it finds applications across a multitude of domains, including environmental monitoring, medical devices, and manufacturing processes. As a reliable tool, the Mpx5700dp offers precise pressure readings that are essential for systems where precision is paramount. This sensor operates on the piezoresistive principle, allowing it to convert pressure into a corresponding electrical signal, which can be interpreted by systems such as microcontrollers or displays.
To understand the Mpx5700dp better, it’s crucial to delve into its operating principle. The sensor utilizes a silicon piezoresistive element, where changes in pressure deform the silicon, leading to a quantifiable change in resistance. This fluctuation in resistance results in a voltage output that is proportional to the pressure difference applied across the sensor. The sensor is equipped with an integrated circuitry that amplifies the output signal and compensates for temperature variations, ensuring stable and accurate readings over a range of environmental conditions.
Arduino is a popular open-source electronics platform ideal for building and prototyping various electronic projects. The synergy between Mpx5700dp and Arduino allows hobbyists and professionals to leverage the sensor's capabilities efficiently. When integrated, they provide real-time and highly accurate data readings essential for both simple and complex projects. The Arduino platform supports multiple communication protocols and programming libraries, making it accessible for users with various levels of experience in electronics and programming.
One of the significant advantages of pairing the Mpx5700dp with Arduino is the ease of implementation. The open-source libraries provided by the Arduino community reduce development time and complexity, allowing users to focus more on creating innovative applications than on troubleshooting communication issues. With the availability of example sketches and comprehensive documentation, even beginners can successfully integrate the sensor into their projects.
The integration process involves several steps that ensure the Mpx5700dp functions optimally within an Arduino setup. Here's a step-by-step guide:
For those unfamiliar with electronics, detailed instructions can ensure that you properly wire the Mpx5700dp to the Arduino. Typically, the sensor has four pins:
Below is a simple example of Arduino code that reads the pressure from the Mpx5700dp and converts the analog value to a pressure reading in kPa:
#define SENSOR_PIN A0 // Analog pin connected to Mpx5700dp output

void setup() {
  Serial.begin(9600); // Start serial communication at 9600 baud
}

void loop() {
  int sensorValue = analogRead(SENSOR_PIN); // Read the analog value
  float voltage = sensorValue * (5.0 / 1023.0); // Convert to voltage
  float pressure = (voltage - 0.2) * (700.0 / 4.8); // Convert voltage to pressure
  Serial.print("Pressure: ");
  Serial.print(pressure); // Display pressure in kPa
  Serial.println(" kPa");
  delay(1000); // Wait for 1 second before taking another reading
}
This code initializes serial communication to send output to the serial monitor. It reads the analog voltage output from the Mpx5700dp sensor, converts it into a pressure reading in kilopascals, and displays it in the Arduino Serial Monitor.
| Feature | Mpx5700dp | Other Sensors |
|---|---|---|
| Pressure Range | 0 to 700 kPa | Variable (50 to 600 kPa typical) |
| Accuracy | ±0.25 kPa | ±0.5 kPa or more |
| Connectivity | Easy integration with Arduino | Varies, sometimes complex |
| Cost | Affordable | Varies, often higher |
| Temperature Range | -40°C to 125°C | Typically less than -20°C to 85°C |
| Size | Compact dimensions | Varies widely |
With its robust performance, the Mpx5700dp sensor is suitable for numerous applications. Here are some of the most prominent use cases it can serve:
As technology advances, the Mpx5700dp continues to find new applications within various fields. Here are additional ways to leverage its capabilities:
The Mpx5700dp sensor's integration with Arduino opens a world of possibilities for developers and engineers seeking precision and reliability in their projects. By understanding how to effectively incorporate this sensor, users can explore innovative applications, simplifying complex pressure measurement challenges while embracing the versatility Arduino offers. Whether for educational purposes, professional projects, or industrial applications, the combination of the Mpx5700dp and Arduino can lead to robust solutions that enhance the user experience and operational effectiveness.
For those interested in extending their knowledge and experience with the Mpx5700dp and Arduino, the following resources can be invaluable:
The journey from learning about pressure sensors to integrating them into practical applications can be exciting and rewarding. The Mpx5700dp, combined with the flexible power of Arduino, allows makers to create a wide range of projects, encouraging innovation and problem-solving skills. Happy tinkering!
Striking the Perfect Balance: Navigating Premiums and Out-of-Pocket Expenses in Senior Insurance Plans

Explore the Tranquil Bliss of Idyllic Rural Retreats

How to Make Lasting Memories at Disneyland Attractions

Affordable Phones and Plans for Seniors

Affordable Full Mouth Dental Implants Near You

Unlock the Top Kept Secrets to Finding Your Ideal Dentist for Flawless Dental Implant Results!

Discovering Springdale Estates

The Guide to Car Trading

Affordable Cell Phones Without Plans


Understanding Rlock Advpl in Business
Rlock Advpl represents a pivotal advancement in business software solutions, offering enhanced security and efficiency for enterprise resource planning systems. This article delves into the intricacies of Rlock Advpl, its application in modern businesses, and the benefits it offers in streamlining operations and safeguarding data. As an expert tool, Rlock Advpl is essential for businesses looking to optimize their IT infrastructure.

Unveiling Atranet Innovation
Atranet represents a cutting-edge concept in networking technology. Harnessing its capabilities can transform digital communication by providing seamless connectivity. Designed to optimize data transfer, security, and efficiency, Atranet is shaping the future of how we connect and share information. This article delves into its structure, applications, and potential impacts on industry practices and consumer experiences.

Understanding Polysulfide Adhesive Applications
This comprehensive guide explores the applications and benefits of polysulfide adhesive, highlighting its unique properties and widespread use in construction, aerospace, and automotive industries. Known for its flexibility and resistance to various environmental factors, polysulfide adhesive is a key component in sealing and bonding applications, providing durability and reliability in demanding conditions.
Comparing Vtex with Salesforce Commerce
This article provides an in-depth comparison between Vtex and Salesforce Commerce, two leading digital commerce platforms. Each offers unique features suited to different business needs. Vtex is renowned for its collaborative commerce approach, while Salesforce Commerce shines with its comprehensive customer relationship management capabilities. Explore their differences, strengths, and insights from industry experts.

Understanding the Latest Chrome Version
This article delves into the intricacies and features of the latest Chrome version. Chrome, developed by Google, is one of the very popular web browsers globally, known for its speed, simplicity, and security features. Each update aims to enhance user experience through improved functionality and performance. Understanding these updates is crucial for both everyday users and developers.

Maximizing Benefits of Solar Panels: Costs and Energy Efficiency
Solar panels can save money and energy. Discover how to optimize installation for maximum benefits.